How to work with different load plan reports in EasyCargo
There are several ways to view the final load plan in EasyCargo, from simply sharing the container load plan via a link to creating complex print reports. In this article, we will look at all types of load plans and discuss their functions in more detail.
3D Load Plan Visualization
The most important, and probably the most noticeable part of the application, is the interactive 3D view of the load. It’s a simulation in which you can view all the items loaded into a container.
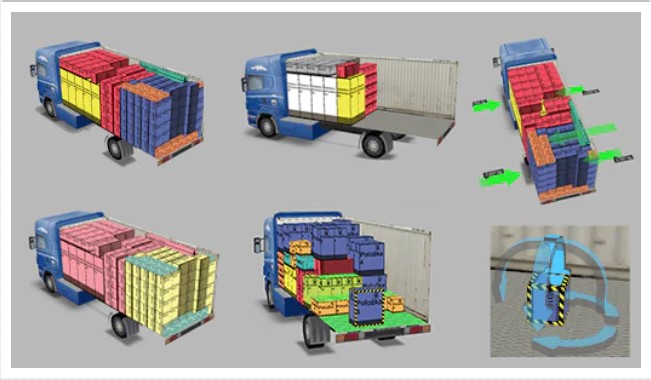
In this 3D load plan, it’s possible to zoom in or out, find out the load on the axles, or examine the loaded items in detail.
Other useful features that may not be so well known are the ability to move the entire cargo area left or right by clicking the right mouse button and displaying item groups by clicking on the color of the desired group in the left sidebar.
Basic views are another great way of visualizing the plan, showing the weight distribution, and, if necessary, allowing you to adjust the angle or zoom in or out.
It is also possible to view the individual steps of the loading process of the entire shipment. This feature is called Step by Step load plan. You can stop the animation at any time to examine each step in greater detail.
Another helpful tool is the manual load plan editor. In this mode, you can move, rotate, add or remove any items. You can activate this mode by clicking on one of the items directly in the load plan. The green area shows where you can place the selected item and the arrows allow you to rotate it. You must be careful when manually editing because the item restrictions set at the beginning are deactivated in this mode. For example, you might move one item on top of a non-stackable one.
Public Link to Load Plan
A practical and quick way to share your load plan with anyone is to generate a public link. It can easily be done by clicking the Generate public link to shipment right next to the Load button in the bottom right corner of the app. You can find all your created links in the Shipment & Reports tab.
After creating the link, you can choose which load plan you want to share. The link to the shipment and report allows you to view an interactive 3D load plan, along with the option to view the step-by-step report or create a print report. The link to the report only is suitable for mobile devices because the 3D plan is not displayed. You can only see the pdf print report with the option of exporting to Excel. You can send both types of links to anyone, even people who are not registered in EasyCargo.
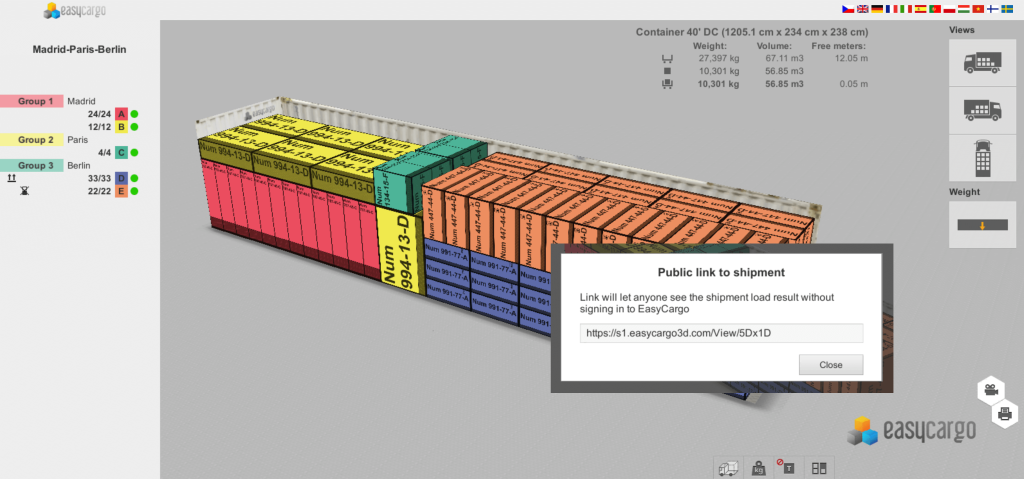
For the correct display of the plan, the user who created the public link must have at least one active license. If the link does not open after clicking, it is because the license has expired. Therefore, to access the loading plan via the link, you must activate the license or ask the person who sent you the link to activate it.
PDF Print Report
For those who prefer a printed or pdf version, EasyCargo offers the option of creating print reports from the Basic or Current view.
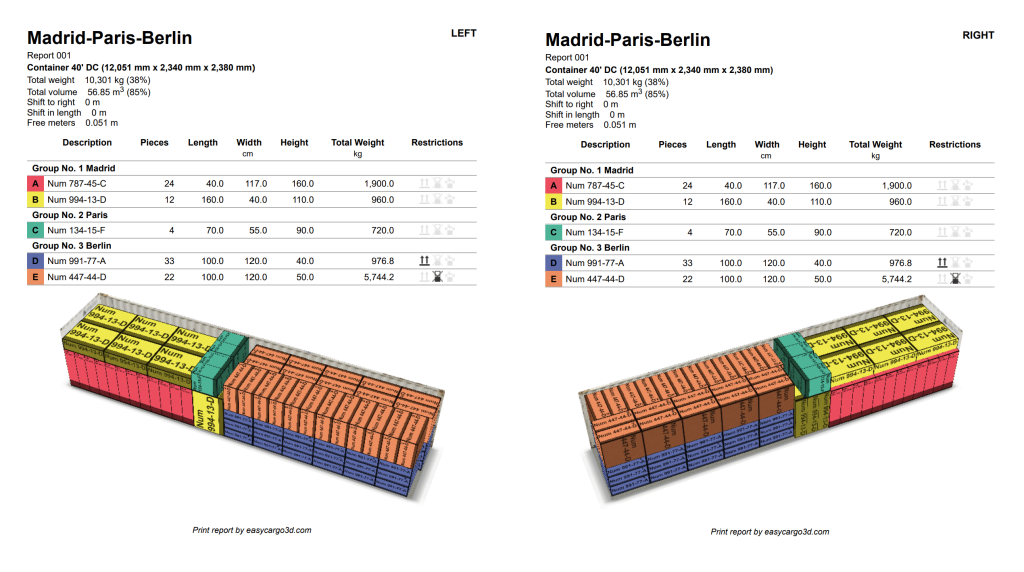
If you choose to create a report from the Basic view, EasyCargo displays two views of the loading area (right and left), the name of the cargo space (with dimensions), the weight of the load, the volume, how much space should remain free from the left and also the remaining free meters. Attached to all this is a complete list of loaded items and their restrictions.
If you select the option to create a report from the Current view, EasyCargo will show you a report with the same load plan view as in the application when creating the print report. All other information about loading remains the same as in the first case.
Excel Print Report
By clicking on the printer icon, you get the option to create a print report in pdf format and export it to Excel. This format contains the same information as a pdf report with the difference that the data is in cells and allows you to further work with it.
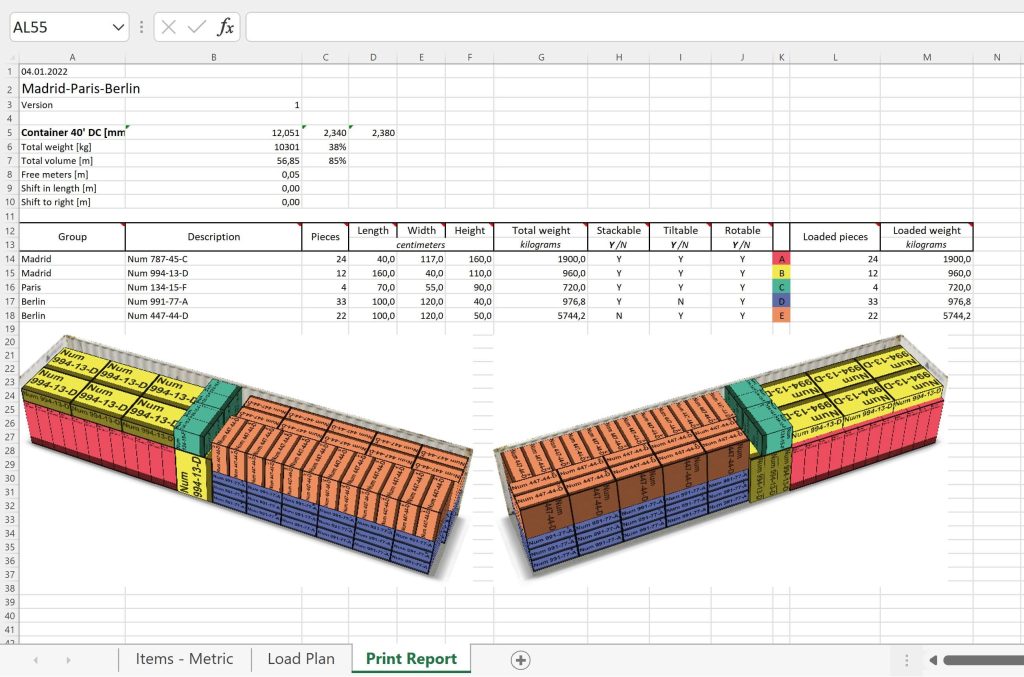
The Excel file contains three tabs: the first one shows all loaded items with their restrictions, the second one shows the load plan with cargo space data (for example, space size, free meters, etc.), and the last tab is a combination of the two – you can see all the items together with cargo space data and load visualization.
Do you want to know more about exporting a load plan to Excel? Then you shouldn’t miss our post.
Step-by-step Print Report
The last report you can create in EasyCargo is the Step-by-step print report. This report is great for visualizing the loading process and makes work easier for e.g. warehouse personnel. It contains all the information as a regular print report, as well as offers a view of the individual loading steps.
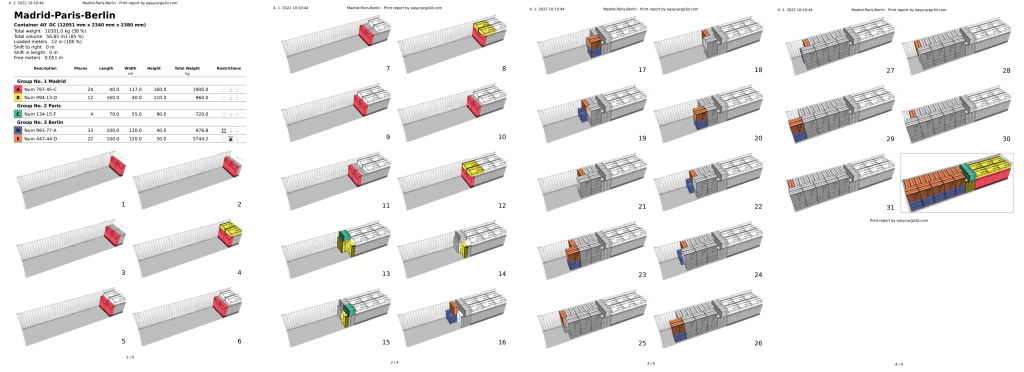
This report can also be printed or exported to pdf format. Are you interested in this way of visualizing your final plan? Get to know it here.


